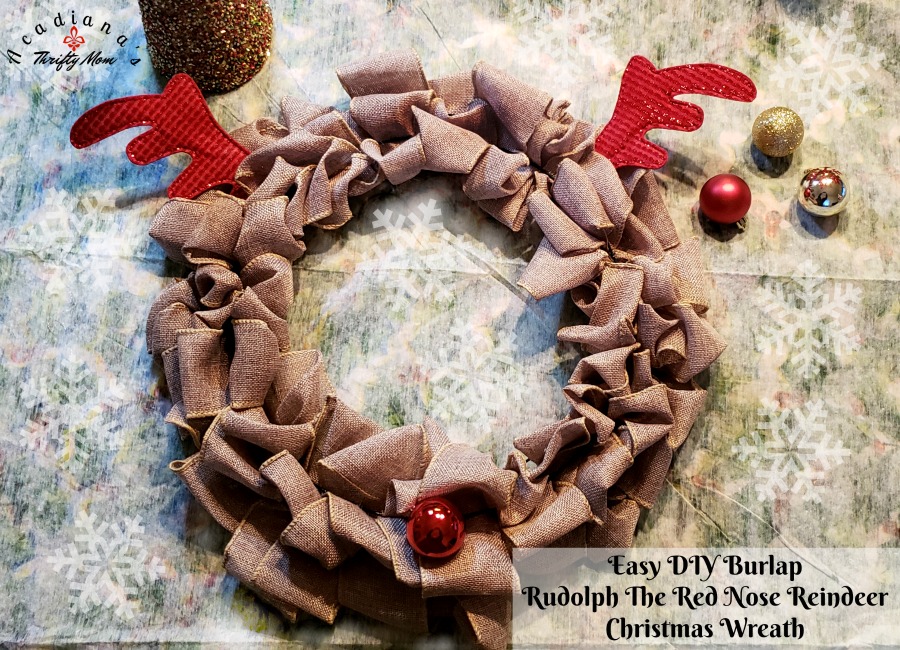
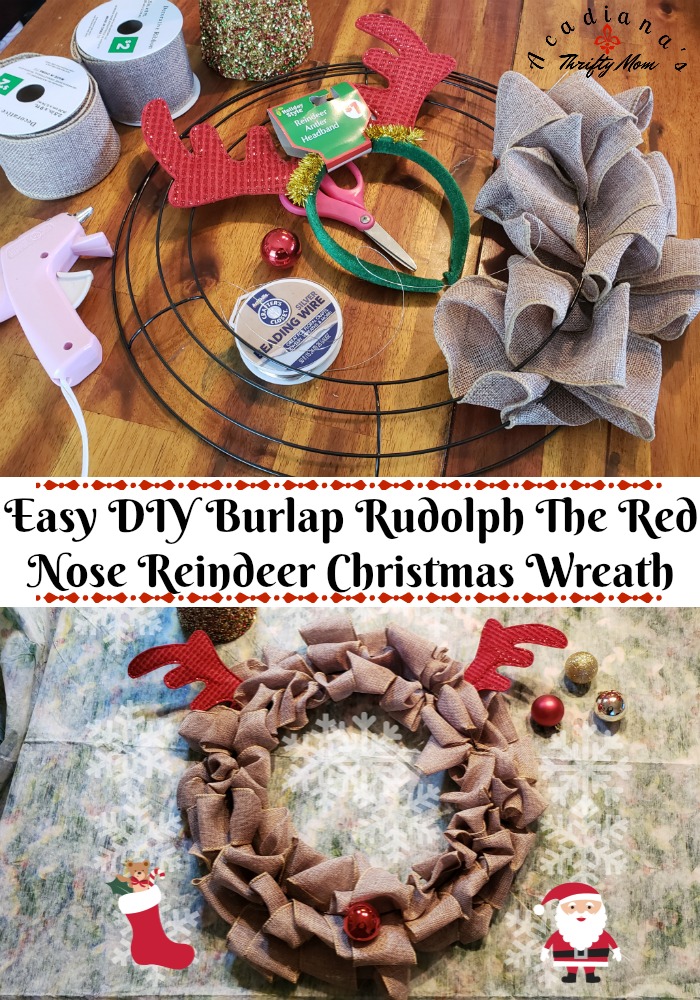
Easy DIY Burlap Rudolph The Red Nose Reindeer Christmas Wreath
Easy DIY Burlap Rudolph The Red Nose Reindeer Christmas Wreath. If you are looking for a super adorable, quick, easy, Christmas wreath idea that won’t break the bank; I have just the wreath for you!
I don’t know about you, but I am always looking for creative ways to celebrate Christmas without spending a fortune. I also love creating crafts and recipes with my kiddos. There’s something empowering about knowing that I can create anything I want and I can teach my kiddos to do the same. You can get more creative when you’re creating something yourself. Test out colors, fabrics, sparkles or no sparkles. The sky really is the limit when it comes to DIY. I hope y’all love this Easy DIY Burlap Rudolph The Red Nosed Reindeer Christmas wreath and have a great time creating it with your family.
Gather your supplies:
- 1 – 14 inch wire wreath frame (I got mine from the Dollar Tree)
- 5 – spools of 2 1/2 inch X 9 ft burlap ribbon
- 1 – small plastic red Christmas ornament
- 1 – set of antlers (I used the antlers found on antler headbands at the Dollar Tree)
- 12 inches of beading wire or any other sturdy wire that is easy to work with
- 1 hot glue gun with 2 glue sticks
Get to creating!
I have a video tutorial below that will be super helpful in creating this wreath. I will walk you through the steps, but watching the video will help a lot!
- Lay out all of your supplies
- Start by folding the burlap ribbon in half lengthwise and in half again.
- Using a 3 inch piece of wire, secure the ribbon to the inside wire of the wreath.
- Pull a “bubble” of ribbon through between the first two wires of the wreath, then repeat for the second and third. You should have 3 even “bubbles” now.
- Scrunch the bubbles over to start the next row of bubbles.
- Flip the wreath over and twist the ribbon twice before repeating steps 3 & 4.
- Keep repeating steps 3 & 4 until the entire wreath is covered. You will secure each end of the ribbon with a 3 inch piece of wire.
- Once the wreath is completely covered and “fluffed” I like to add some hot glue to the back to secure the ribbon even more.
- Hot glue the red ornament to the bottom of the wreath.
- Center the red ornament and glue the antlers about 9 inches apart at the top of the wreath. I like to lay it all out before I glue it and mark my spots with a black sharpie.
- Allow the hot glue to dry and hang your wreath up for decoration or give as a gift!
Make Fresh Cranberry Sauce In Your Instant Pot In 10 Minutes


One Reply to “Easy DIY Burlap Rudolph The Red Nose Reindeer Christmas Wreath”